#
UniConfig shell
UniConfig shell is a command-line interface for Uniconfig. Accessible over SSH, it allows users to interact with Uniconfig features including the following:
- Read operational data of devices
- Manipulate device configurations
- Manipulate configuration templates
- Manipulate data stored in Unistore
- Invoke device or UniConfig operations
- Manipulate global UniConfig settings
Uniconfig shell is model-driven, therefore its interface is mostly auto-generated from YANG schemas (e.g., tree structure of data-nodes or available RPC/action operations).
#
Configuration
UniConfig shell is disabled by default. To enable it, set the configuration
parameter cli-shell.ssh-server.enabled to true in the
application.properties file.
All available settings and descriptions are listed below:
# CLI shell config
cli-shell.ssh-server.enabled=false
cli-shell.default-unistore-node-id=system
cli-shell.default-callbacks-repository=callbacks
cli-shell.enable-scrolling=false
cli-shell.history-size=500
cli-shell.history-file-size=1000
cli-shell.ssh-server.port=2022
cli-shell.ssh-server.inet-address=127.0.0.1
cli-shell.ssh-server.idle-timeout=600
cli-shell.ssh-server.auth-timeout=120
cli-shell.ssh-server.username-password-auth.username=admin
cli-shell.ssh-server.username-password-auth.password=secret
cli-shell.shell-colors.description-color=default
cli-shell.shell-colors.error-color=default
cli-shell.shell-colors.info-color=default
cli-shell.shell-colors.warning-color=default
After starting UniConfig, the SSH server listens for connections on port 2022 and the loopback interface. UniConfig Shell has two connection timeouts:
- Authorization timeout, after which the connection is closed if the other party has not been authenticated (in seconds). The default value is 120 seconds.
- Idle timeout, after which the connection is closed if idle (in seconds). The default value is 600 seconds.
#
Navigating in the shell
- Every command line starts with a command prompt that ends with the
>character. The identifier of the command prompt changes based on the current shell mode and the state of execution in this mode. - The
exitandquitcommands are available in all shell modes:exitreturns the state to the parent statequitreturns the state to the nearest parent mode (e.g., configuration mode, root mode, operational show mode). If the current state of the shell represents some mode,quitandexithave the same effect of returning to the parent mode.
- Typed commands are sent to UniConfig using the
ENTERkey. UniConfig processes the command and may send a response to the console depending on the command. All commands are processed synchronously, meaning that multiple commands cannot be executed in parallel in the same SSH session. CTRL-AandCTRL-Emove the cursor to the beginning or end of the current line.CTRL-Lclears the shell screen.- Arrow keys
UP/DOWNload previous commands in the command history. CTRL-Ccancels the current line and moves to a new blank line.TABloads suggestions in the current context. HitTABagain to navigate through suggested commands using the arrow keys and select usingENTER. Leave the submode with suggestions using the shortcutCTRL-E. The text in brackets contains a description of the next command.
uniconfig-topology-vnf21>show
> (output to file) interfaces (Interfaces configuration)
SNMP-NOTIFICATION-MIB nacm (Parameters for NETCONF Access Control Model.)
SNMP-TARGET-MIB ntp (NTP configuration)
SNMP-VIEW-BASED-ACM-MIB redundancy (Redundancy Configuration)
aaa (AAA management) service-node-groups (Service Node Gateway Services Configuration)
alarms (Alarm configuration) snmp (Simple Network Management Protocol (SNMP) configuration)
alias (Create command alias.) system (System configuration and statistics)
confdConfig (ConfD configuration.) | (pipe)
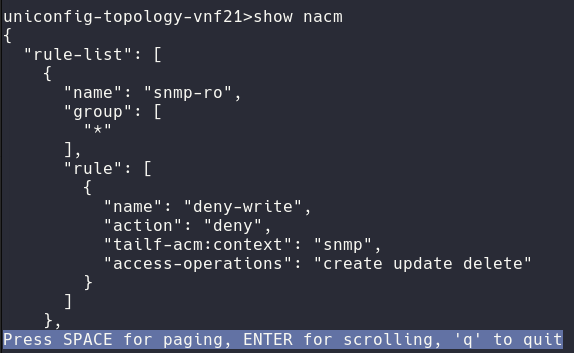
event (Event scripts)If the output is longer than the length of the command line window, it is
displayed with scrolling capability. Use ENTER to display the next line and
SPACE to display the next page. Use the q key to leave scrolling mode. You
can only scroll only in one direction, towards the end of the output.
#
Root mode
Root mode is the initial mode after successful authentication.
Example: Log into UniConfig shell:
Connection to 127.0.0.1 closed.
[jtoth@JT-WORK ~]$ ssh admin@127.0.0.1 -p 2022
Password authentication
(admin@127.0.0.1) Password:
uniconfig>uniconfig>
configuration-mode (opening configuration mode)
exit
hide-get (Setting item to be hidden in get)
hide-set (Setting item to be hidden in set)
show (reading data from device)
show-history (show history [max number of commands])
unhide-get (Setting item to be unhidden in get)
unhide-set (Setting item to be unhidden in set)The exit command is used to exit the UniConfig shell interface altogether
(disconnecting SSH client).
- Example - Exit UniConfig shell:
uniconfig>exit
Console closed. Press any key to exit!
Connection to 127.0.0.1 closed by remote host.
Connection to 127.0.0.1 closed.
Currently, only username/password single-user authentication is supported as configured in the application.properties file.
#
Accessing sub-modes
Root mode acts as a gateway to open the configuration and show modes.
- Example - Switch to configuration mode:
uniconfig>configuration-mode
config>
#
Show command history
The show-history command is used to display a list of N last invoked commands.
This command is also available in configuration mode.
- Example - Show the last five executed commands:
config>show-history 5
----- History of commands -----
10-05-2022 14:48:14 : configuration-mode
10-05-2022 14:48:16 : request
10-05-2022 14:48:17 : exitr
10-05-2022 14:48:18 : exit
10-05-2022 14:48:24 : show-history 5
Note that the list of invoked commands persists across UniConfig restarts and SSH connections.
#
Unhide and hide operations
The following commands are used to unhide and hide attributes in application properties:
unhide-getis used to unhide an attribute hidden in application properties for read purposes (restconf.schema-filters.hidden-data-on-read-by-extensions).unhide-setis used to unhide an attribute hidden in application properties for write purposes (restconf.schema-filters.ignored-data-on-write-by-extensions).hide-getis used to hide attributes that were unhidden withunhide-get.hide-setis used to hide attributes that were unhidden withunhide-set.
When unhide is set for a GET or SET operation, the request URL for the operation
contains the unhide query parameter. In the following example, the unhide
parameter is set to all:
http://localhost:8181/rests/data/network-topology:network-topology/topology=uniconfig/node=vnf21/configuration?unhide=all
This is also available for callbacks. Request and set operations for callbacks uses
restconf.schema-filters.ignored-data-on-write-by-extensions and show operations uses
restconf.schema-filters.hidden-data-on-read-by-extensions.
The command also gives confirmation that the attribute was added to or removed from the unhidden list.
When unhide-get or hide-get are called without parameters, the output
contains a list of all unhidden parameters. The same applies to unhide-set and
hide-set.
uc>unhide-get deprecated
Attribute tailf:hidden deprecated was added to unhidden get list.
uc>unhide-set full
Attribute tailf:hidden full was added to unhidden set list.uc>hide-get deprecated
Attribute tailf:hidden deprecated was removed from unhidden get list.
uc>hide-set full
Attribute tailf:hidden full was removed from unhidden set list.uc>unhide-get
unhidden get:
tailf:hidden deprecated
tailf:hidden debug
uc>unhide-set
unhidden set:
tailf:hidden fullWhen used with the parameter all, the unhide operation applies to all
parameters defined in application properties for read or write purposes.
#
Examples
Example - Attempt to show hidden callbacks field details with unhide
uc>unhide-get deprecated
Attribute tailf:hidden deprecated was added to unhidden get list.
uc>configuration-mode
Transaction with id: fe30f909-82bd-4037-b262-a5e147034ab6 was successfully created
uc(config)#show callbacks vnms system details
{
  "path": "/vnms/system/details",
  "headers": {
    "host": "127.0.0.1:8443",
    "user-agent": "Java-http-client/21.0.1",
    "accept": "application/json",
    "authorization": "Bearer abcdefghijklmn",
    "content-type": "application/json"
  },
  "method": "GET",
  "body": "",
  "fresh": false,
  "hostname": "127.0.0.1",
  "ip": "::1",
  "ips": [],
  "protocol": "https",
  "query": {},
  "subdomains": [],
  "xhr": false,
  "os": {
    "hostname": "f8278c7a721b"
  },
  "connection": {
    "servername": false
  },
  "clientCertificate": {}
}
uc(config)#
Example - Attempt to show hidden callbacks field details without unhide
uc>hide-get deprecated
Attribute tailf:hidden deprecated was removed from unhidden get list.
uc>configuration-mode
Transaction with id: fe30f909-82bd-4037-b262-a5e147034ab6 was successfully created
uc(config)#show callbacks vnms system details
Unknown arguments: details
uc(config)#
Example - Attempt to set hidden callbacks field reset-password with unhide
uc>unhide-set full
Attribute tailf:hidden full was added to unhidden set list.
uc>configuration-mode
Transaction with id: fe30f909-82bd-4037-b262-a5e147034ab6 was successfully created
uc(config)#set callbacks vnms system reset-password
Failed to send request to remote server; Body is not specified!
uc(config)#
Example - Attempt to set hidden callbacks field reset-password without unhide
uc>hide-set full
Attribute tailf:hidden full was removed from unhidden set list.
uc>configuration-mode
Transaction with id: fe30f909-82bd-4037-b262-a5e147034ab6 was successfully created
uc(config)#set callbacks vnms reset-password
Unknown arguments: reset-password
uc(config)#
Example - Attempt to request hidden callbacks field unlock-user with unhide
uc>unhide-set full
Attribute tailf:hidden full was added to unhidden set list.
uc>configuration-mode
Transaction with id: fe30f909-82bd-4037-b262-a5e147034ab6 was successfully created
uc(config)#request callbacks vnms system unlock-user
Request body is needed
uc(config)#
Example - Attempt to request hidden callbacks field unlock-user without unhide
uc>hide-set full
Attribute tailf:hidden full was removed from unhidden set list.
uc>configuration-mode
Transaction with id: fe30f909-82bd-4037-b262-a5e147034ab6 was successfully created
uc(config)#request callbacks vnms system unlock-user
Unknown arguments: unlock-user
uc(config)#
#
Configuration mode
Configuration mode provides access to the following:
- CRUD operations on top of persisted UniConfig, UniStore and template nodes
- CRUD operations on top of persisted UniConfig settings
- UniConfig RPC operations such as
commitorcalculate-diff
After opening configuration mode, a new UniConfig transaction is created. All
operations invoked in configuration mode are executed in the scope of the
created transaction. The transaction is automatically closed after leaving
configuration mode (exit or quit command).
If commit or checked-commit are invoked, the transaction is automatically
refreshed. The user stays in configuration mode with a newly created
transaction.
config>
others
callbacks                           (operations on callbacks)
exit                                  (return to parent mode)
quit                                    (return to root mode)
request                                   (execution of RPCs)
settings                             (operations on settings)
show-history          (show history [max number of commands])
template-topology       (operations on the template topology)
uniconfig-topology     (operations on the uniconfig topology)
unistore-topology       (operations on the unistore topology)
aliases
diff (alias for 'request calculate-diff target-nodes/node *')
Commands like SET, SHOW and DELETE are now available only on a specific device
and are not accessible in root configuration mode.
config>uniconfig-topology test-node-1
uniconfig-topology-test-node-1>
SNMP-NOTIFICATION-MIB                                               nacm               (Parameters for NETCONF Access Control Model.)
SNMP-TARGET-MIB                                                     ntp                                           (NTP configuration)
SNMP-VIEW-BASED-ACM-MIB                                             quit                                        (return to root mode)
aaa                                              (AAA management)   redundancy                             (Redundancy Configuration)
alarms                                      (Alarm configuration)   service-node-groups (Service Node Gateway Services Configuration)
alias                                     (Create command alias.)   set                                               (set operation)
confdConfig                                (ConfD configuration.)   show                                  (show data in current path)
delete                                         (delete operation)   show-history              (show history [max number of commands])
event                                             (Event scripts)   snmp    (Simple Network Management Protocol (SNMP) configuration)
exit                                      (return to parent mode)   system                      (System configuration and statistics)
interfaces                             (Interfaces configuration)
#
Show configuration
The show operation is used to display selected subtrees.
The subtree path can be constructed interactively with the help of shell
suggestions/auto-completion mechanism. Construction of the path works the same
way for SET, SHOW and DELETE operations.
Example - Display the configuration of a selected container:
- First move into a specific topology on a specific device:
config>uniconfig-topology
nodes
test-node-1 test-node-2config>uniconfig-topology test-node-1
uniconfig-topology-test-node-1>- After this, the
showoperation is available:
uniconfig-topology-test-node-1>show
>                                                (output to file)   interfaces                             (Interfaces configuration)
SNMP-NOTIFICATION-MIB                                               nacm               (Parameters for NETCONF Access Control Model.)
SNMP-TARGET-MIB                                                     ntp                                           (NTP configuration)
SNMP-VIEW-BASED-ACM-MIB                                             redundancy                             (Redundancy Configuration)
aaa                                              (AAA management)   service-node-groups (Service Node Gateway Services Configuration)
alarms                                      (Alarm configuration)   snmp    (Simple Network Management Protocol (SNMP) configuration)
alias                                     (Create command alias.)   system                      (System configuration and statistics)
confdConfig                                (ConfD configuration.)   |                                                          (pipe)
event (Event scripts)uniconfig-topology-test-node-1>show interfaces vni
> (output to file) vni-0/4 vni-0/6 vni-0/8 | (pipe)
vni-0/10 vni-0/5 vni-0/7 vni-0/9uniconfig-topology-test-node-1>show interfaces vni vni-0/10
{
"name": "vni-0/10",
"ether-options": {
"link-mode": "auto",
"link-speed": "10m"
},
"description": "sample description",
"enable": true
}
#
Delete configuration
The delete operation removes a selected subtree.
Example - Remove a container:
- First move to a specific topology on a specific device:
config>uniconfig-topology
nodes
test-node-1 test-node-2config>uniconfig-topology test-node-1
uniconfig-topology-test-node-1>- After this, the
deleteoperation is available:
uniconfig-topology-test-node-1>delete
SNMP-NOTIFICATION-MIB                                               interfaces                             (Interfaces configuration)
SNMP-TARGET-MIB                                                     nacm               (Parameters for NETCONF Access Control Model.)
SNMP-VIEW-BASED-ACM-MIB                                             ntp                                           (NTP configuration)
aaa                                              (AAA management)   redundancy                             (Redundancy Configuration)
alarms                                      (Alarm configuration)   service-node-groups (Service Node Gateway Services Configuration)
alias                                     (Create command alias.)   snmp    (Simple Network Management Protocol (SNMP) configuration)
confdConfig                                (ConfD configuration.)   system                      (System configuration and statistics)
event (Event scripts)uniconfig-topology-test-node-1>delete interfaces vni vni-0/10 ether-options
uniconfig-topology-test-node-1>- Quit to configuration mode, commit using request mode and return to the device on the topology:
uniconfig-topology-test-node-1>show interfaces vni vni-0/10
{
  "name": "vni-0/10",
  "description": "sample description",
  "enable": true
}
#
Set configuration
The set operation can be used for the following:
- Set the value of a single leaf.
- Set the values of multiple leaves in a single shell operation.
- Set a list of values for a leaf-list.
- Replace the entire subtree using a JSON snippet.
Example - Set the value of a single leaf:
config>uniconfig-topology iosxruniconfig-topology-iosxr>set lacp config system-priority
(type: uint16, constraints: [Range: [[0..65535]]])uniconfig-topology-iosxr>set lacp config system-priority 100
uniconfig-topology-iosxr>uniconfig-topology-iosxr>show lacp config
{
"system-priority": 100
}Example - Set values for multiple leaves under the hold-time container:
config>uniconfig-topology iosxruniconfig-topology-iosxr>set interfaces interface GigabitEthernet0/0/0/0 hold-time config up
(type: uint32, constraints: [Range: [[0..4294967295]]])uniconfig-topology-iosxr>set interfaces interface GigabitEthernet0/0/0/0 hold-time config up 20 down
(type: uint32, constraints: [Range: [[0..4294967295]]])uniconfig-topology-iosxr>set interfaces interface GigabitEthernet0/0/0/0 hold-time config up 20 down 15
uniconfig-topology-iosxr>uniconfig-topology-iosxr>show uniconfig iosxr interfaces interface GigabitEthernet0/0/0/0 hold-time
{
"config": {
"up": 20,
"down": 15
}
}A JSON snippet can be written to a selected data-tree node by entering the
json sub-mode. In this sub-mode, you can type multiple lines that represent a
well-formed JSON document. At the end, confirm the set operation using the
pattern w! + newline, or cancel the set operation with the pattern q! +
newline.
Example - Replace configuration of an interface using a JSON snippet:
config>uniconfig-topology iosxruniconfig-topology-iosxr>set interfaces interface GigabitEthernet0/0/0/1 config json
{
> "config": {
> "type": "iana-if-type:ethernetCsmacd",
> "enabled": true,
> "name": "GigabitEthernet0/0/0/1"
> }
> }
w!uniconfig-topology-iosxr>show interfaces interface GigabitEthernet0/0/0/1
{
"name": "GigabitEthernet0/0/0/1",
"config": {
"type": "iana-if-type:ethernetCsmacd",
"enabled": true,
"name": "GigabitEthernet0/0/0/1"
}
}Example - Leave json sub-mode without executing set operation:
uniconfig-topology-iosxr>set interfaces interface GigabitEthernet0/0/0/1 config json
{
>   "config": {
>     "type": "iana-if-type:ethernetCsmacd",
>     "enabled": true,
>     "name": "GigabitEthernet0/0/0/1"
>   }
> }
q!uniconfig-topology-iosxr>show interfaces interface GigabitEthernet0/0/0/1
{
"name": "GigabitEthernet0/0/0/1",
"config": {
"type": "iana-if-type:ethernetCsmacd",
"enabled": false,
"name": "GigabitEthernet0/0/0/1"
}
}
#
Execute UniConfig operation
The request command is used to execute UniConfig operations such as commit
or calculate-diff in the UniConfig transaction:
- The command is available in configuration mode
- You can fill in input parameters and values interactively or via provided JSON snippet
Example - Execute UniConfig RPCs in the scope of the open UniConfig transaction:
config>request commit
>                                                                            (output to file)
do-rollback (Controls whether to roll back successfully configured devices in case of failu…)
do-validate (Option to enable/disable validation at commit. Default value is true - validate)
json                                                                             (JSON input)
target-nodes/node
| (pipe)config>request calculate-diff target-nodes/node iosxr
{
"node-results": {
"node-result": [
{
"node-id": "iosxr",
"topology-id": "uniconfig",
"created-data": [
{
"path": "/network-topology:network-topology/topology=uniconfig/node=iosxr/frinx-uniconfig-topology:configuration/frinx-openconfig-system:system",
"data": "{
"frinx-openconfig-system:system": {
"frinx-huawei-global-config-extension:banner": {
"config": {
"banner-text": "Test banner"
}
}
}
}"
}
]
}
]
}
}
[24.04.2023, 09:25:31]config>request sync-from-network
> (output to file)
check-timestamp (Perform timestamp comparison(last known to Uniconfig vs current timestamp …)
json (JSON input)
target-nodes/node
| (pipe)config>request sync-from-network check-timestamp true target-nodes/node iosxr
{}
[24.04.2023, 09:26:48]
#
Request operational mode
This command has been merged with request configuration mode and is now available only in configuration mode.
Request mode allows users to:
- Invoke selected UniConfig requests that read or alter UniConfig settings.
- Invoke RPCs or actions provided by network devices or other southbound mountpoints.
Input parameters and values can be filled in interactively or via a provided JSON snippet. The transaction is passed from configuration mode.
Example - Invoke RPC execute-and-read with typed input parameters:
request>cli iosxr
operations
clear-journal
execute (Simple execution of single or multiple commands on remote terminal. Multiple comma…)
execute-and-expect (Form of the 'execute-and-read' RPC that can contain 'expect(..)' patter…)
execute-and-read (Execution of the sequence of commands specified in the input. These comma…)
execute-and-read-until
read-journalrequest>cli iosxr execute-and-read
> (output to file)
command (Input configuration snippet (one or multiple commands separated by newline).)
json (JSON input)
wait-for-output-timer (If no output is received during this time, then execute next command…)
| (pipe)request>cli iosxr execute-and-read wait-for-output-timer 2 command "show users"
{
"output": "Mon May 16 07:28:30.405 UTC
Line User Service Conns Idle Location
* vty0 cisco ssh 0 00:00:00 192.168.1.42"
}
[24.04.2023, 09:34:21]Example - Execute the same RPC execute-and-read using input JSON:
request>cli iosxr execute-and-read json
  {
>     "input": {
>         "command": "show users",
>         "wait-for-output-timer": 2
>     }
> }
w!
{
   "output": "Mon May 16 07:37:55.256 UTC
   Line            User                 Service  Conns   Idle        Location
*  vty0            cisco                ssh          0  00:00:00     192.168.1.42"
}
[24.04.2023, 09:36:48]
UniConfig shell does not support interactive typing of input arguments for an
RPC/action that contains the list YANG element. Such operations must be
executed using input JSON.
#
Show operational mode
Show mode allows users to:
- Display operational data about UniConfig itself (e.g., logging status, list of open transactions or list of acquired subscriptions)
- Display operational data of network devices
show>
others
cli                    (reading data from CLI device)
exit                          (return to parent mode)
logging-status               (reading logging status)
netconf            (reading data from NETCONF device)
netconf-subscriptions (reading netconf subscriptions)
notifications                 (reading notifications)
quit                            (return to root mode)
show-history  (show history [max number of commands])
snapshots-metadata       (reading snapshots metadata)
transaction-log             (reading transaction log)
transactions               (reading transaction data)
aliases
lbr      (alias for 'logging-status broker restconf')
After opening show mode, a new UniConfig transaction is opened. The transaction is closed when you leave this mode.
uniconfig>show
show>
Example - Display configuration of selected subtree:
show>cli iosxr interfaces(frinx-openconfig-interfaces) interface GigabitEthernet0/0/0/0
{
  "name": "GigabitEthernet0/0/0/0",
  "config": {
    "type": "iana-if-type:ethernetCsmacd",
    "enabled": false,
    "name": "GigabitEthernet0/0/0/0"
  }
}
Example - Display selected system configuration:
show>transactions transaction-data
[
  {
    "transaction-id": "5d9c8819-5b05-4c7a-b7e5-3c84478aeeb0",
    "idle-timeout": 300,
    "last-access-time": "2022-May-16 07:02:31.501 +0000",
    "hard-timeout": 1800,
    "creation-time": "2022-May-16 07:02:31.501 +0000"
  },
  {
    "transaction-id": "80091b4b-5432-41cd-9277-1b18ae77b45f",
    "idle-timeout": 300,
    "last-access-time": "2022-May-16 07:02:42.747 +0000",
    "hard-timeout": 1800,
    "creation-time": "2022-May-16 07:02:42.747 +0000"
  }
]
#
Pipe operations
UniConfig shell supports pipe operations similar to Unix shell/bash pipes. When
a command is followed by the pipe sign (|), the output of the command is
passed to the selected pipe operation.
Example:
config>uniconfig-topology R1uniconfig-topology-R1>show interface-configurations interface-configuration | grep netmask
"netmask": "255.255.255.0"Supported pipe operations are:
grep- Show only lines that match supplied regexmatch- Same asgrep, but can be used with optional parameters to also show lines before and after matched linescontext-match- Same asgrep, but also shows parent structurebrief- Display root elements in short table formathide-empty-data-nodes- Hide data nodes without child nodeshide-attributes- Hide attributes of data nodes
#
Redirecting output
The output of an executed command can be redirected to a file using the > sign
followed by a filename.
Example:
config>uniconfig-topology R1uniconfig-topology-R1>show interface-configurations interface-configuration act\ GigabitEthernet0/0/0/1 > '/home/output.txt' In this case, output in the console is empty but the content of the output.txt file is a follows:
{
  "active": "act",
  "interface-name": "GigabitEthernet0/0/0/1",
  "shutdown": [
    null
  ]
}
#
Aliases
You can define aliases in UniConfig shell. A json file named shell-aliases is included in the UniConfig distribution for this purpose. After unpacking the UniConfig distribution, the file can be found under Uniconfig/distribution/packaging/zip/target/uniconfig-x.x.x/config. The file contains some sample aliases.
/*
Example: "alias": "command1 command2 * command3 *"
Alias name must be a simple word without spaces
Asterisk symbol is a placeholder. We can dynamically add an alias value
*/
{
  "configuration-mode": {
    "diff": "request calculate-diff target-nodes/node *"
  },
  "request": {
    "shh": "show-history"
  },
  "show": {
    "lbr": "logging-status broker restconf"
  }
}
#
Alias creation
Aliases cannot be created dynamically, only before Uniconfig is started. The following rules apply:
- The alias name must be unique and cannot contain whitespaces.
- The command can contain a wildcard (
*). In this case, the user is prompted to add a value. - The alias is only visible in the mode where it was defined.
Example - Execute the alias diff xr5:
uniconfig>configuration-mode
config>diff xr5
{
  "node-results": {
    "node-result": [
      {
        "node-id": "xr5",
        "topology-id": "uniconfig"
      }
    ]
  }
}
[24.04.2023, 09:31:32]
config>
Example - Execute the alias lbr:
uniconfig>show
show>lbr
{
  "broker-identifier": "restconf",
  "is-logging-broker-enabled": false
}
show>
Example - Execute the alias shh:
uniconfig>request
request>show-history
----- History of commands -----
18-05-2022 14:13:09 : show
18-05-2022 14:13:18 : lbr
18-05-2022 14:17:43 : exit
18-05-2022 14:17:48 : request
18-05-2022 14:17:57 : shcs
18-05-2022 14:18:10 : shcs n1
18-05-2022 14:18:25 : show-history
request>
#
Callbacks
Callbacks include sending POST and GET requests to the remote server and
invoking user scripts from the UniConfig shell.
The following is required to use callbacks:
- Necessary YANG modules - YANG modules that are required by the callbacks.
- Configuration - Enable callbacks in config/application.properties and set the remote server and access token.
- Update repository - Add the necessary YANG modules from step 1 into at least one YANG repository in the cache directory, and either define remote endpoints and scripts in a YANG file or create a new one for callbacks. For a definition of remote endpoints, use the frinx-callpoint@2022-06-22.yang extension.
- UniStore node - Create a UniStore node using the YANG repository containing the necessary YANG modules from step 1 and a YANG file with defined endpoints and scripts.
In UniConfig shell, step 4 is optional as UniConfig creates dummy UniStore nodes for all repositories that meet the conditions in step 3. In this case, the dummy UniStore node name is identical to the YANG repository name.
In RestConf, step 4 is mandatory.
#
Necessary YANG modules
The following YANG modules are required:
- frinx-callpoint@2022-06-22.yang (not needed for scripts)
- tailf-common@2018-11-12.yang
- tailf-meta-extensions@2017-03-08.yang
- tailf-cli-extensions@2018-09-15.yang
#
Configuration
By default, callbacks are disabled and the host and port for the remote server are empty in config/application.properties.
To enable callbacks, set the configuration parameter callbacks/enabled to
true. It is also necessary to set the host and port for the remote server and
store an access token in the UniConfig database.
The host and port for the remote server can be set in three ways:
- Before starting Uniconfig, in the config/application.properties file. The port number is optional:
# Callbacks config
callbacks.enabled=true
callbacks.remote-server.host=127.0.0.1
callbacks.remote-server.port=8443- After starting UniConfig, with a
PUTrequest:
  curl --location --request PUT 'http://127.0.0.1:8181/rests/data/callbacks:callbacks-settings' \
  --header 'Accept: application/json' \
  --header 'Authorization: Basic YWRtaW46YWRtaW4=' \
  --header 'Content-Type: application/json' \
  --data-raw '{
      "callbacks-settings": {
          "remote-server": {
              "host": "127.0.0.5",
              "port": 9000
          }
      }
}'- After starting UniConfig, with cli-shell:
  uniconfig>configuration-mode
  config>set settings callbacks-settings remote-server host 127.0.0.5 port 9000
  config>request commit
The access token can be stored in the UniConfig database in one of two ways:
- After starting UniConfig, with a
PUTrequest:
  curl --location --request PUT 'http://127.0.0.1:8181/rests/data/callbacks:callbacks-settings/access-token' \
  --header 'Accept: application/json' \
  --header 'Authorization: Basic YWRtaW46YWRtaW4=' \
  --header 'Content-Type: application/json' \
  --data-raw '{
      "access-token": "token"
}'- After starting UniConfig, with cli-shell:
  uniconfig>configuration-mode
  config>set settings callbacks-settings access-token token
  config>request commit
Available settings and descriptions for callbacks are listed below:
# Callbacks config
callbacks.enabled=true
callbacks.remote-server.host=127.0.0.1
callbacks.remote-server.port=8443
#
Update repository
First, create or update the YANG repository by using the
frinx-callpoint@2022-06-22.yang extension displayed in the following
snippet. There is only one extension, url, with the argument point.
module frinx-callpoint {
    yang-version 1.1;
    namespace "http://frinx.io/callpoint";
    prefix callpoint;

    revision 2022-06-22 {
        description "Initial revision";
    }

    extension url {
        argument point;
    }
}
#
Add call-point (GET request)
The following snippet shows how to create a call-point in the frinx-test YANG file by using the frinx-callpoint@2022-06-22.yang extension.
module frinx-test {
    yang-version 1.1;
    namespace "http://frinx.io/frinx-test";

    import frinx-callpoint { prefix "fcal"; }

    container test {
        container get-request {
            fcal:url /data/from/remote;
        }
    }
The argument of the url extension is /data/from/remote, which is appended to
the end of the remote server URI configured in
config/application.properties. Thus the final address for the remote
call-point is https://remote.server.io/data/from/remote.
#
Add action (POST request)
The following snippet shows how to create an action in the frinx-test YANG file by using the frinx-callpoint@2022-06-22.yang extension. You must also import tailf-common.yang.
The action consists of:
- The action name, defined by
tailf:action. - The suffix for the remote endpoint, defined by
fcal:url. - The input that contains body of the request. This part is optional.
module frinx-test {
    yang-version 1.1;
    namespace "http://frinx.io/frinx-test";

    import frinx-callpoint { prefix "fcal"; }
    import tailf-common { prefix "tailf"; }

    container post-request {
        tailf:action test-action {
            fcal:url /invoke/remote/test-action;
            input {
                container body {
                    leaf data {
                        type string;
                    }
                }
            }
        }
    }
#
Add script
The following snippet shows how to create a script in the frinx-test YANG file by using tailf-common.yang. It is not necessary to import the frinx-callpoint@2022-06-22.yang extension.
The script consists of:
- The script name, defined by
tailf:action. - The path to the script, defined by
tailf:exec. - Arguments for the script, defined by
tailf:exec.
Arguments can be dynamic (i.e., the user can pass values to them) or static (flags). Follow these conventions when creating arguments:
- Each argument must contain a name (for example,
-n,-j). - Dynamic arguments must be enclosed in
$(...)(for example,$(name)). - Flags are simple words without whitespace (for example,
VIP,UPPER,upper).
module frinx-test {
    yang-version 1.1;
    namespace "http://frinx.io/frinx-test";

    import tailf-common { prefix "tailf"; }

    container script {
        tailf:action test-script {
            tailf:exec '/tmp/test_script.sh' {
                tailf:args '-n $(name) -j $(job) -v VIP';
            }
        }
    }
#
UniStore node
A UniStore node can be created by RestConf or UniConfig shell. If a repository
is explicitly defined by the query parameter
?uniconfig-schema-repository=repository-name, this repository must contain all
necessary YANG modules. If a repository name is not defined when the UniStore
node is created, all necessary YANG modules must be in the latest schema
repository.
#
Examples
Example - Invoke callpoint in shell:
config>callbacks repository-name
callbacks-repository-name>show test get-request
{
  "response": {
    "value": "some-value"
  }
}
callbacks-repository-name>
Example - Invoke action in shell:
config>request
request>callbacks repository-name post-request test-action body data "some-data"
{
  "response": {
    "value": "some-data was processed"
  }
}
request>
Example - Execute user script in shell:
config>request
request>callbacks repository-name script test-script /tmp/test_script.sh
VIP    job    name
request>callbacks repository-name script test-script /tmp/test_script.sh job "FRINX"
VIP    name
request>callbacks repository-name test-script /tmp/test_script.sh job "FRINX" VIP
Name:
Job: Frinx
is VIP

Exit code: 0
request>