#
Add a device to inventory and install it
#
Adding device to inventory
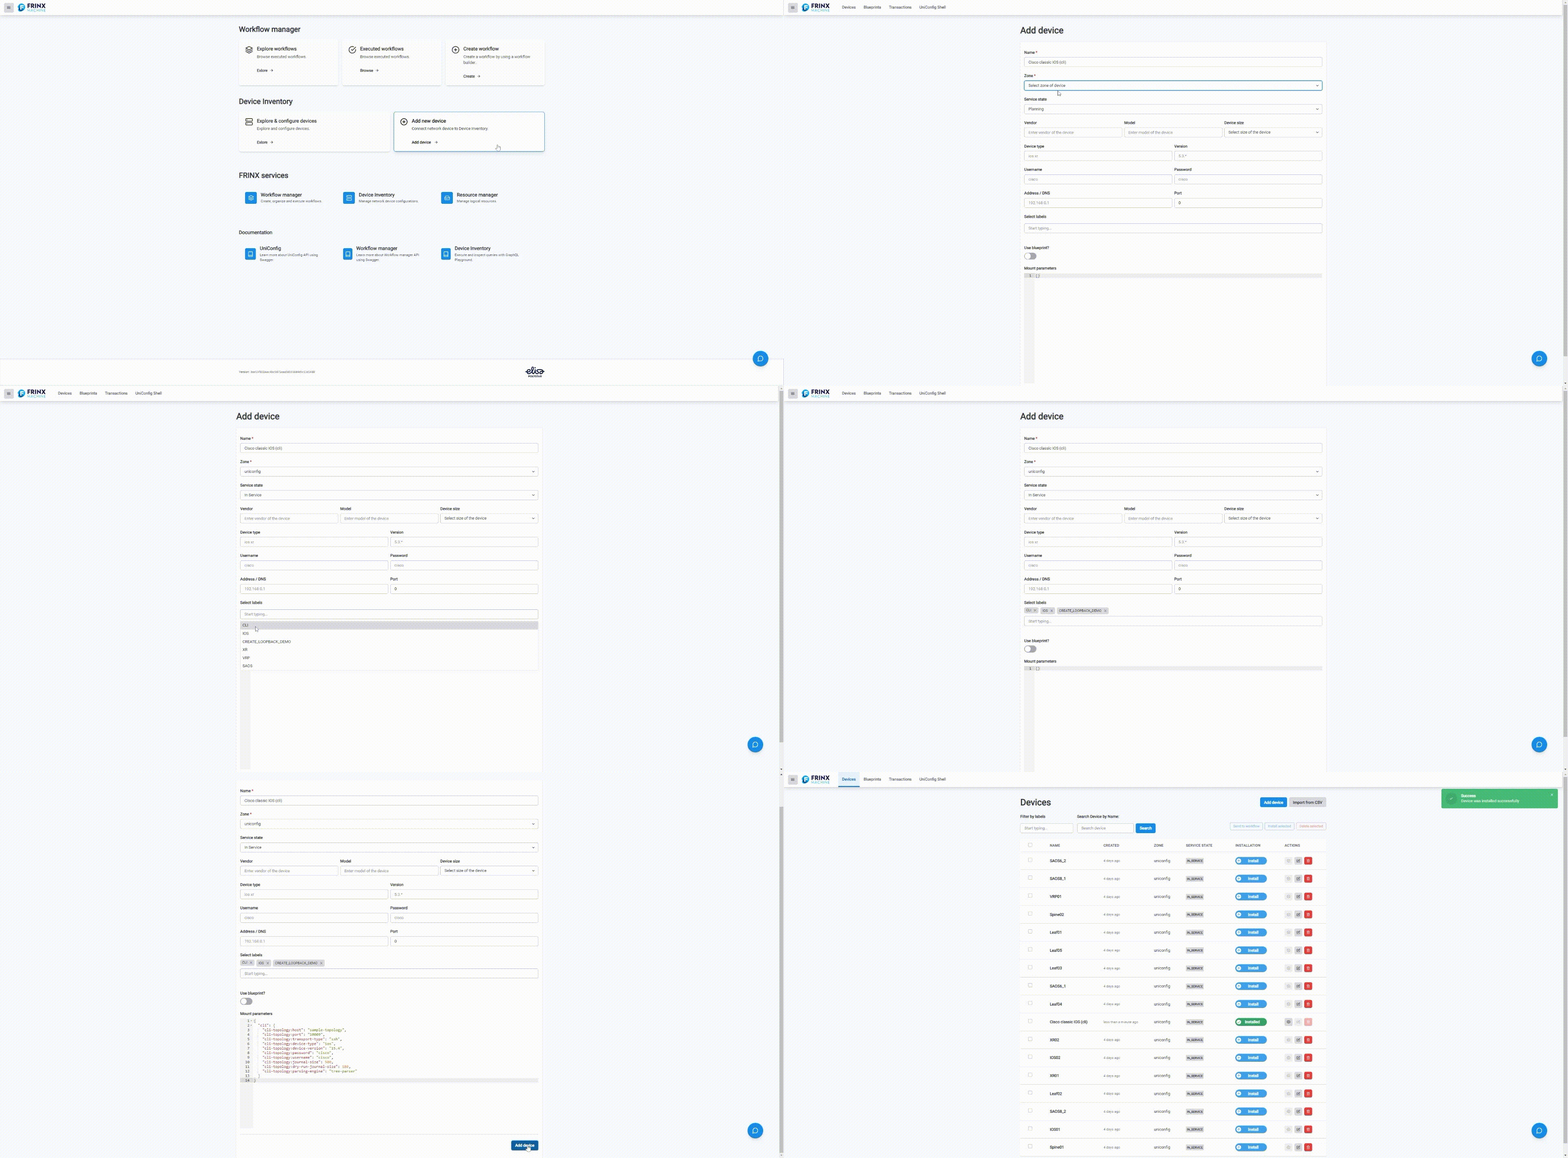
At the FRINX Machine Dashboard under Device Inventory section click on Add new device panel. The page with the form titled Add device opens.

#
JSON examples
New devices added to Device inventory are defined by JSON code snippets. (These snippets are part of UniConfig RPC connection-manager:install-node.) They are similar to Blueprints. This snippet is going to be filled into Mount parameters field.
Another way is to add a new device from blueprint: toggle the Use blueprint? switch in the form and choose the blueprint that you want to use from Select blueprint drop-down list.
Note: following snippets refer to devices present in sample-topology demo
#
Cisco classic IOS (cli)
{
    "cli": {
        "cli-topology:host": "sample-topology",
        "cli-topology:port": "10009",
        "cli-topology:transport-type": "ssh",
        "cli-topology:device-type": "ios",
        "cli-topology:device-version": "15.4",
        "cli-topology:password": "cisco",
        "cli-topology:username": "cisco",
        "cli-topology:journal-size": 500,
        "cli-topology:dry-run-journal-size": 180,
        "cli-topology:parsing-engine": "tree-parser"
    }
}
#
Cisco IOS XR (netconf)
{
    "netconf":{
        "netconf-node-topology:host":"sample-topology",
        "netconf-node-topology:port":17000,
        "netconf-node-topology:tcp-only":false,
        "netconf-node-topology:username":"cisco",
        "netconf-node-topology:password":"cisco",
        "netconf-node-topology:session-timers": {
            "netconf-node-topology:keepalive-delay":5
        },
        "netconf-node-topology:other-parameters": {
            "netconf-node-topology:dry-run-journal-size":180
        },
        "uniconfig-config:uniconfig-native-enabled":true,
        "uniconfig-config:blacklist":{
            "uniconfig-config:path":[
                "openconfig-interfaces:interfaces",
                "ietf-interfaces:interfaces",
                "openconfig-vlan:vlans",
                "openconfig-routing-policy:routing-policy",
                "openconfig-lldp:lldp",
                "Cisco-IOS-XR-l2vpn-cfg:l2vpn",
                "Cisco-IOS-XR-group-cfg:groups",
                "openconfig-acl:acl",
                "openconfig-network-instance:network-instances"
            ]
        }
    }
}
#
Huawei (cli)
{
    "cli":{
        "cli-topology:host":"sample-topology",
        "cli-topology:port":"10008",
        "cli-topology:password":"huawei",
        "cli-topology:username":"huawei",
        "cli-topology:device-type":"vrp",
        "cli-topology:journal-size":500,
        "cli-topology:device-version":"*",
        "cli-topology:parsing-engine":"tree-parser",
        "cli-topology:transport-type":"ssh",
        "cli-topology:dry-run-journal-size":180
    }
}
#
CALIX (netconf)
Note: this device is not present in sample-topology
{
    "netconf":{
        "netconf-node-topology:host":"sample-topology",
        "netconf-node-topology:port":17001,
        "uniconfig-config:blacklist":{
            "uniconfig-config:path":[],
            "uniconfig-config:extension":[]
        },
        "netconf-node-topology:password":"PASSWORD",
        "netconf-node-topology:tcp-only":false,
        "netconf-node-topology:username":"USERNAME",
        "netconf-node-topology:session-timers":{
            "netconf-node-topology:keepalive-delay":0
        },
        "uniconfig-config:uniconfig-native-enabled":true,
        "uniconfig-config:install-uniconfig-node-enabled":true
    }
}
#
Nokia (netconf)
Note: this device is not present in sample-topology
{
    "netconf":{
        "netconf-node-topology:host":"sample-topology",
        "netconf-node-topology:port":17001,
        "netconf-node-topology:session-timers": {
            "netconf-node-topology:keepalive-delay":10
        },
        "netconf-node-topology:tcp-only":false,
        "netconf-node-topology:username":"USERNAME",
        "netconf-node-topology:password":"PASSWORD",
        "uniconfig-config:uniconfig-native-enabled":true,
        "uniconfig-config:install-uniconfig-node-enabled":true,
        "uniconfig-config:blacklist":{
            "uniconfig-config:path":[]
        },
        "netconf-node-topology:yang-module-capabilities":{
            "capability":[]
        }
    }
}
#
SAOS 6 (cli)
{
	"cli": {
		"cli-topology:host": "sample-topology",
		"cli-topology:port": "10001",
		"cli-topology:password": "frinx",
		"cli-topology:username": "frinx",
		"cli-topology:device-type": "saos",
		"cli-topology:journal-size": 500,
		"cli-topology:device-version": "6",
		"cli-topology:parsing-engine": "one-line-parser",
		"cli-topology:transport-type": "ssh",
		"cli-topology:dry-run-journal-size": 180
	}
}
#
SAOS 8 (cli)
{
	"cli": {
		"cli-topology:host": "sample-topology",
		"cli-topology:port": "10002",
		"cli-topology:password": "frinx",
		"cli-topology:username": "frinx",
		"cli-topology:device-type": "saos",
		"cli-topology:journal-size": 500,
		"cli-topology:device-version": "8",
		"cli-topology:parsing-engine": "one-line-parser",
		"cli-topology:transport-type": "ssh",
		"cli-topology:dry-run-journal-size": 180
	}
}
#
Install the new device from Inventory
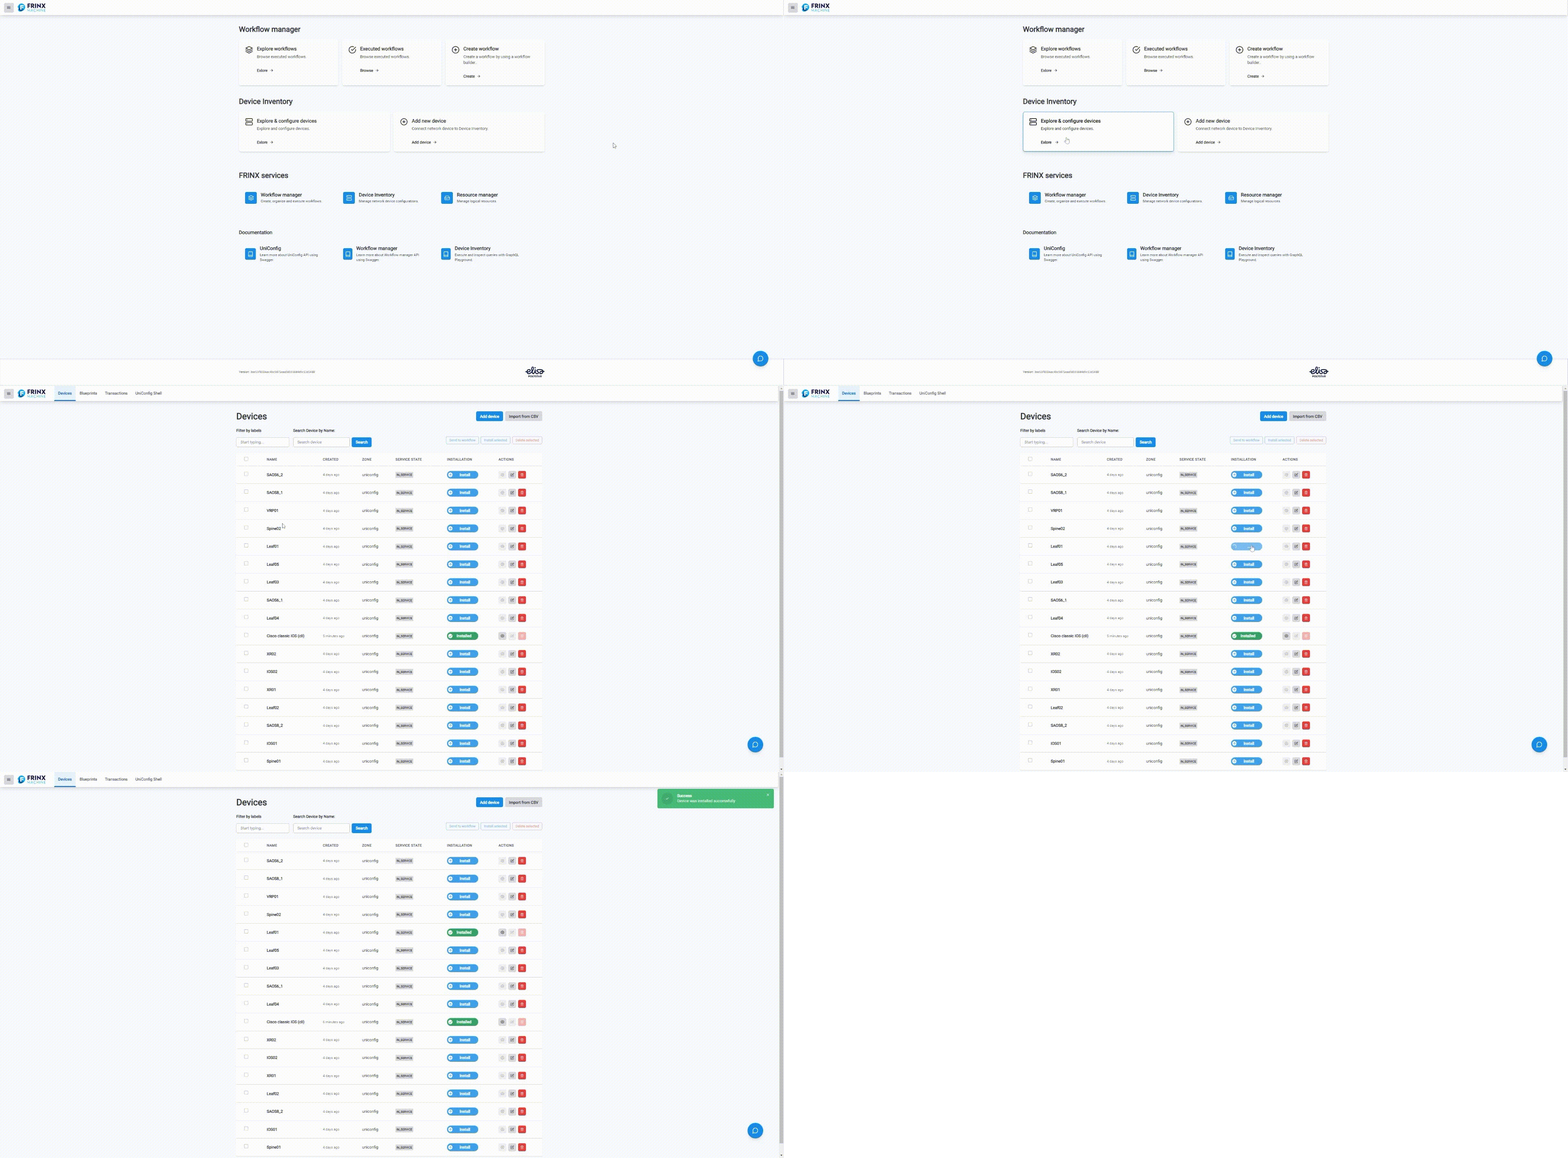
After the device is added we can install it to UniConfig. At the FRINX Machine Dashboard under Device Inventory section click on Explore & configure devices panel. The page titled Devices opens - it lists all devices from Device inventory.
Click blue Install button located on the row next to a device which you want to install - after successful installation button will change to green button with the text Installed.

If you follow instruction properly, your devices are now listed in Device inventory and installed, ready to be operated through Frinx Machine.
